Run Pareto Anywhere for Azure
Our step-by-step guide to deploy and run Pareto Anywhere as a serverless function on Microsoft Azure.
The TL;DR (Too Long; Didn't Read)
Learn how to run reelyActive's Pareto Anywhere open source middleware efficiently as an Azure Function.
This will transform ambient wireless data from Azure IoT Hub into real-time context: who/what is how.
- What will this accomplish?
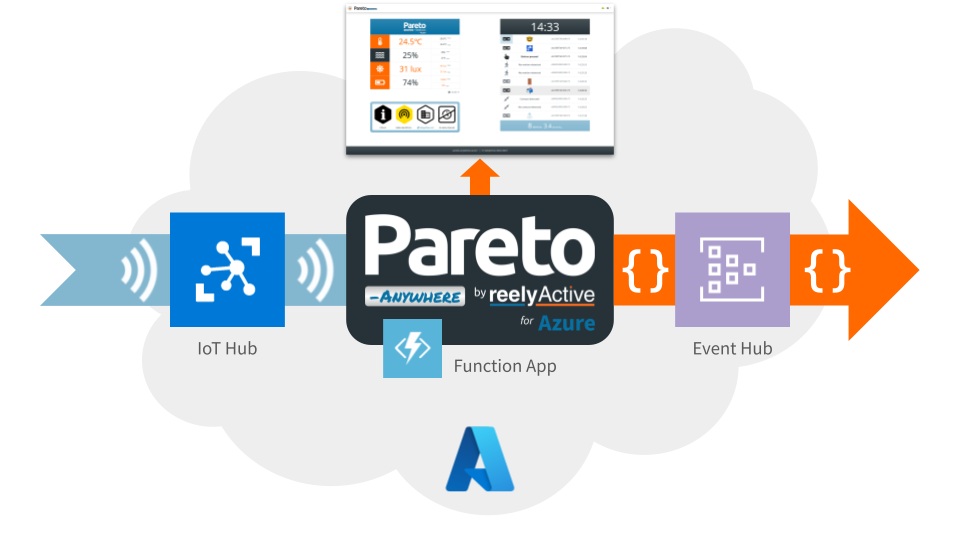
- Pareto Anywhere for Azure will run on-demand to process data from Azure IoT Hub into web-standard JSON to feed downstream Microsoft Azure services and APIs.
- Why an Azure Function?
- Running as a serverless function is highly efficient and scalable, and facilitates integration with complementary Microsoft Azure services.
- What ambient data?
- Currently supported sources include Bluetooth Low Energy and EnOcean Wireless Standard packets relayed via Aruba IoT Transport for Microsoft Azure.
Alternatives
Tutorials to consider instead
-

-
Run Pareto Anywhere for Azure with Aruba APs
Deploy, using automation, with HPE Aruba Networking access points as an IoT data source.
Architecture Overview
Azure resources and their implication in the data paths
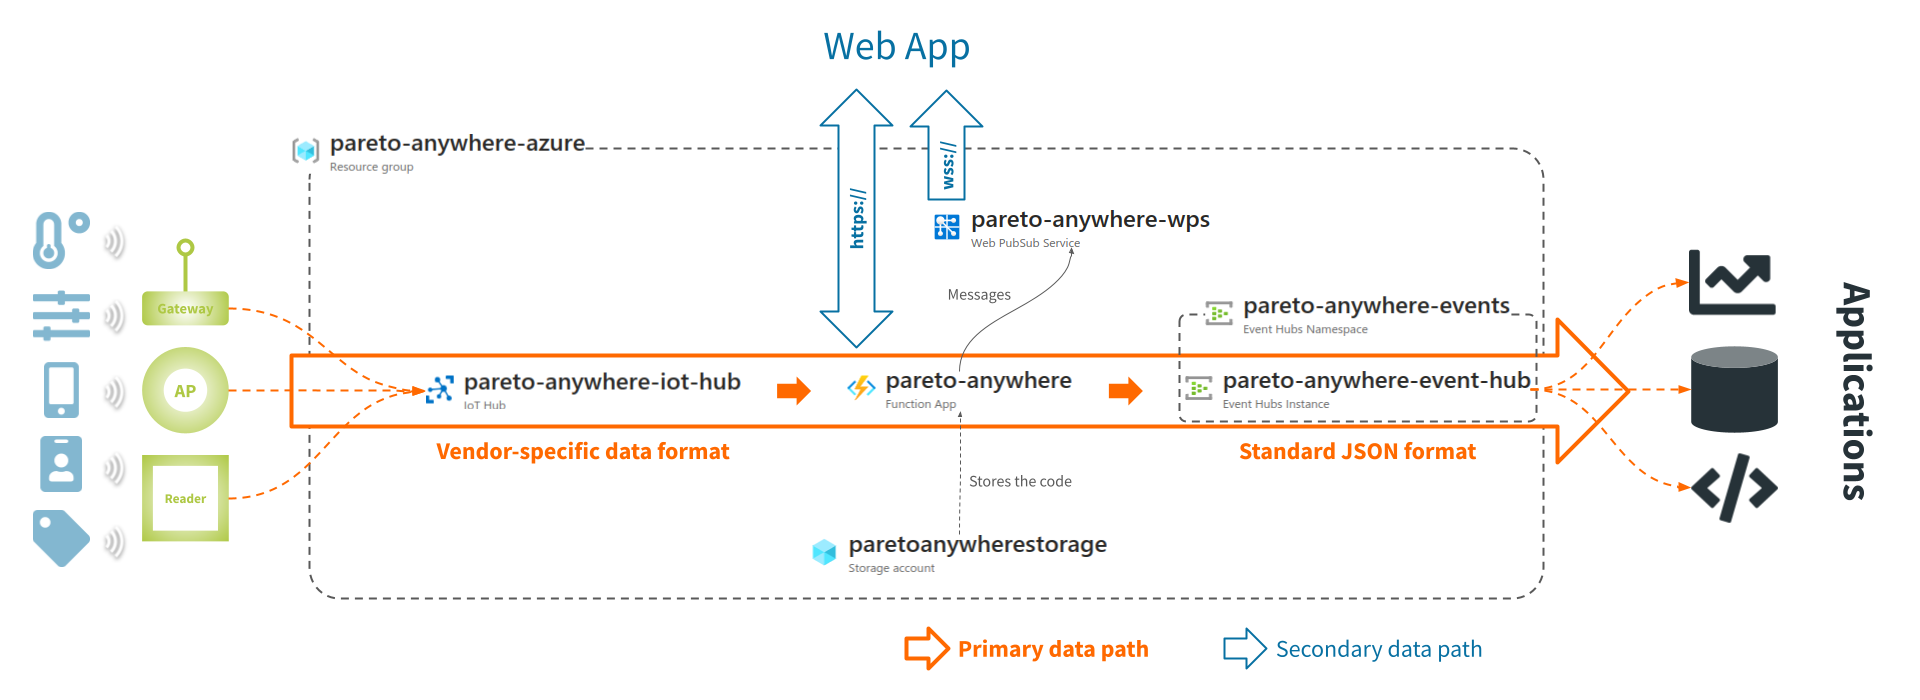
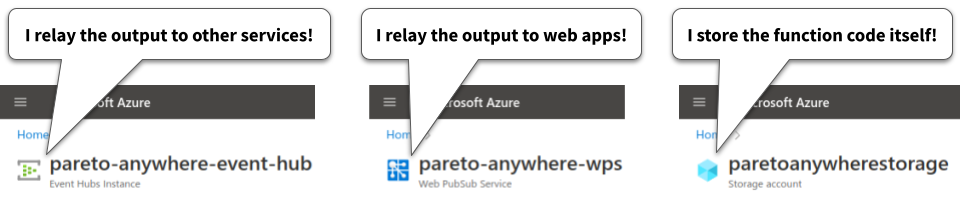
Pareto Anywhere for Azure ingests vendor-specific data from Azure IoT Hub and outputs standard JSON via Azure Event Hubs. The standard JSON output can also be consumed and visualised from a Web application.
Prerequisites
A Microsoft Azure account.
If necessary, create a (free) Azure account. Confirm that you can successfully log into an active Azure account.
Preparing the environment Step 1 of 6
Prepare an environment for deployment either with Codespaces or on your computer.
- Why go Codespaces?
- GitHub Codespaces offers the convenience of a cloud environment with pre-installed dependencies.
- Why go local?
- A local deployment offers the familiarity of your own environment, however dependencies must be installed manually.

Prerequisites
Validate the prerequisites for either a Codespaces or a Local environment.
Codespaces
A GitHub account
Browse to github.com to create an account, if required, or to log into an existing account.
Local
Node.js & git
From a terminal run node --version & git --version to check if Node.js & git are already installed on your computer.
-

-
Download Node.js
Download and install the latest LTS version of Node.js.
-

-
Download git
Download and install the latest release of git.
Install pareto-anywhere-azure Part 1
Complete the steps below for either a Codespaces or a Local environment.
Codespaces
Open a web browser and complete the following steps:
- Browse to /pareto-anywhere-azure
- Click the < > Code button, select the Codespaces tab and click + to create a Codespace on master 5 mins
Pareto Anywhere for Azure and its node_modules dependencies will already be installed once the IDE appears: type npm list in the terminal to list these modules and their versions, if desired.
Local
Open a terminal and complete the following steps:
- Browse to the folder in which you wish to download the pareto-anywhere-azure source code.
- Clone the pareto-anywhere-azure repository with the command
git clone https://github.com/reelyactive/pareto-anywhere-azure.git(or download as ZIP and extract as pareto-anywhere-azure). - Browse to the pareto-anywhere-azure folder with the command
cd pareto-anywhere-azure - Install all dependencies with the command
npm install1 min
Create the local settings file Part 2
Create a new file named local.settings.json in the pareto-anywhere-azure folder with the following contents:
{
  "IsEncrypted": false,
  "Values": {
    "FUNCTIONS_WORKER_RUNTIME": "node",
    "iot_hub_name": "",
    "EventHubConnectionString": "",
    "event_hub_name": "",
    "EventHubSendAppSetting": "",
    "web_pub_sub_hub_name": "",
    "WebPubSubConnectionString": "",
    "AzureWebJobsStorage": ""
  }
}
This file specifies the names and endpoints of the resource instances with which Pareto Anywhere for Azure will interface. The "Values" will be populated in the following steps of this tutorial.
Codespaces users may wish to save a local copy of this file as a backup in the event that the Codespace is deleted.
Install the Azure dependencies Part 3
For a Local environment, install the Azure Functions Core Tools and the Azure CLI on your computer by following the official Microsoft tutorials:
- Install the Azure Functions Core Tools (v4.x or higher) and confirm the installation by running the command
func --versionand observing the installed version - How to install the Azure CLI. Confirm the installation by running the command
az --versionand observing the installed version
Creating an Azure IoT Hub Step 2 of 6
If required, create a Resource Group and an IoT Hub on Azure.
- What's a resource group?
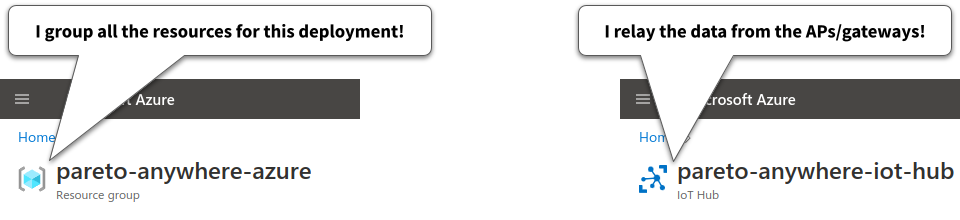
- A resource group is a container that holds related resources, typically with a shared lifecycle, for an Azure solution.
- What's IoT Hub?
- Azure IoT Hub is a cloud-hosted solution back end that facilitates the connection of virtually any device.
If connecting to an existing Azure IoT Hub, skip ahead to Part 3.
Aruba Networks users should instead follow the Aruba IoT Transport for Microsoft Azure Tech Note instructions to create an IoT Hub.
Create a Resource Group Part 1
From the home page of the Azure Portal, create a new Resource Group in your geographical region by following the 5 tabbed steps below:
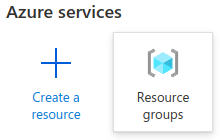
Select Resource groups from the Azure services menu bar at the top of the portal.
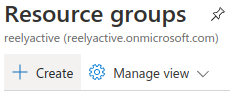
Select + Create to create a new Resource group, unless an existing Resource group in the list already meets your geographical/logical requirements, in which case skip ahead to Part 2.
Enter a meaningful name for your resource group and select the geographical region best suited for your deployment. Then click Review + create at the bottom of the page.

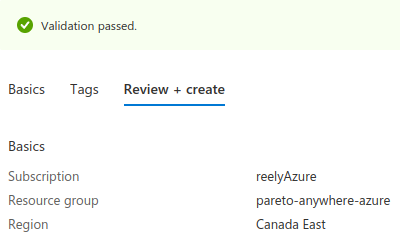
Click Create at the bottom of the page after validating the resource details.
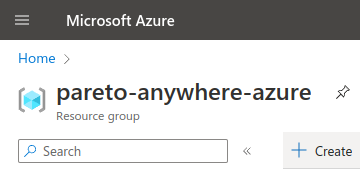
The resource group has been created.
From the resource group page it is possible to create resources by selecting + Create, which is the subject of Part 2 and additional steps below.
Create an IoT Hub Part 2
From the Resource group page in the Azure Portal, create a new IoT Hub by following the 5 tabbed steps below:
Select + Create from the menu bar on the Resource Group page.
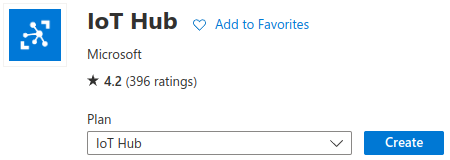
From the Marketplace, search for and select IoT Hub.
Click Create to create an instance of this resource.
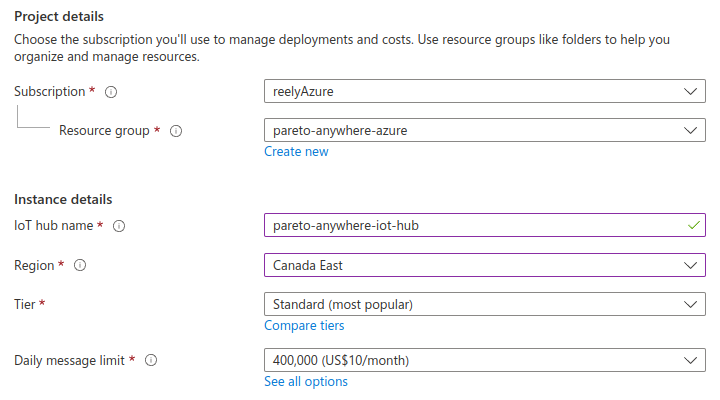
Enter a meaningful name for your IoT Hub and select the geographical region best suited for your deployment. Choose a tier* and message limit** adapted to the scale of your deployment. Then click Review + create at the bottom of the page.
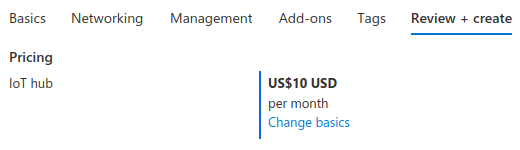
Click Create at the bottom of the page after validating the resource details.
The IoT Hub has been created.
Continue to Part 3 below to retrieve the IoT Hub's endpoint from which Pareto Anywhere for Azure will receive messages.
Copy the IoT Hub endpoint Part 3
From the IoT Hub page of the Azure Portal, select Built-in endpoints from the menu on the left.
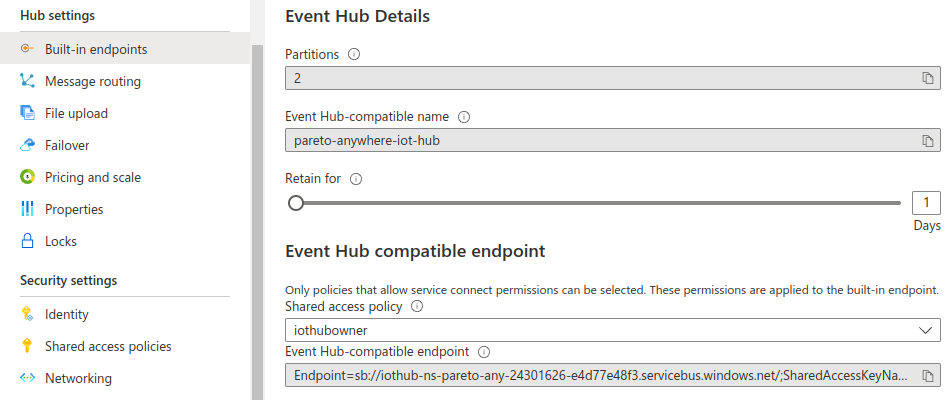
In the local.settings.json file, update the "EventHubConnectionString" & "iot_hub_name" values by copying and pasting the following:
- Event Hub-compatible name
- Event Hub-compatible endpoint
as indicated below.
{
  "Values": {
    ⋮
    "iot_hub_name": "pareto-anywhere-iot-hub",
    "EventHubConnectionString": "Endpoint=…",
    ⋮
  }
}
Then save the file.
Creating supporting resources Step 3 of 6
Create an Event Hub, Web PubSub and storage account on Azure.
- What's an Event Hub?
- Event Hubs is a fully managed, real-time data ingestion service that facilitates the streaming of events to downstream consumers.
- What's Web PubSub?
- Web PubSub provides real-time messaging for web applications using WebSockets.
Create an Event Hubs Namespace Part 1
From the Resource group page in the Azure Portal, create a new Event Hubs Namespace by following the 5 tabbed steps below:
Select + Create from the menu bar on the Resource Group page.
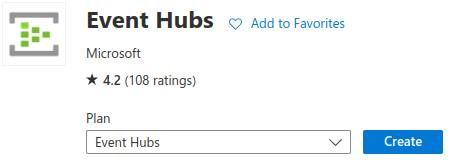
From the Marketplace, search for and select Event Hubs.
Click Create to create an instance of this resource.
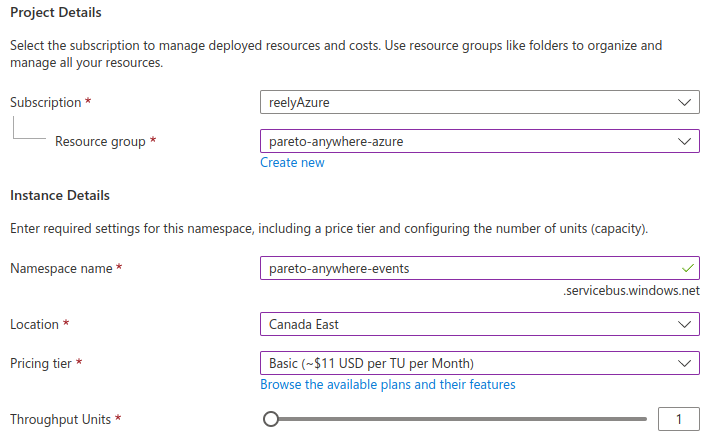
Enter a meaningful name for your Event Hubs and select the geographical region best suited for your deployment. Choose a tier and throughput adapted to the scale of your deployment. Then click Review + create at the bottom of the page.
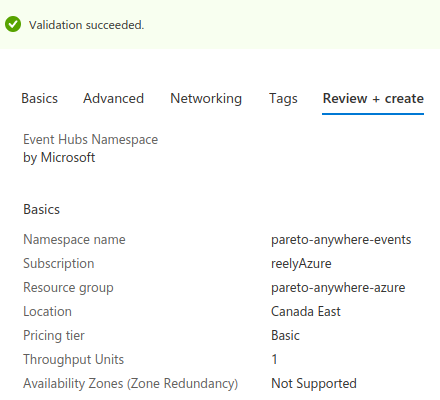
Click Create at the bottom of the page after validating the resource details.
The Event Hubs Namespace has been created.
Proceed to Part 2 to create an Event Hub within this namespace.
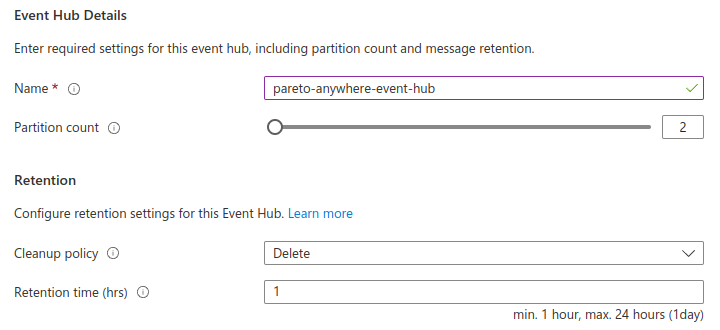
Create an Event Hub Part 2
From the Event Hubs Namespace page in the Azure Portal, create a new Event Hub by following the 4 tabbed steps below:
Select + Event Hub from the menu bar on the Event Hubs Namespace page.
Enter a meaningful name for your Event Hub and select a retention policy best suited for your deployment. Then click Review + create at the bottom of the page.
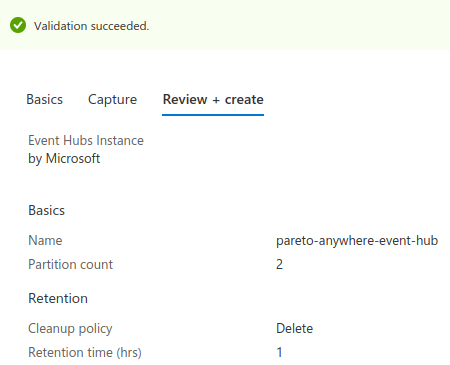
Click Create at the bottom of the page after validating the resource details.
The Event Hub will be created and your browser will be directed back to the Event Hubs Namespace page.
Enter the name of the Event Hubs Instance into the local.settings.json file as the "event_hub_name" value, as indicated below, and then save the file.
{
  "Values": {
    ⋮
    "event_hub_name": "pareto-anywhere-event-hub",
    ⋮
  }
}
Create a shared access policy Part 3
From the Event Hubs Namespace page in the Azure Portal, create a new Shared access policy for the Event Hub by following the 5 tabbed steps below:
From the Event Hubs Namespace page, select Event Hubs in the Entities section of the menu at left.

Then, from the list, select the event hub that you created in Part 2.
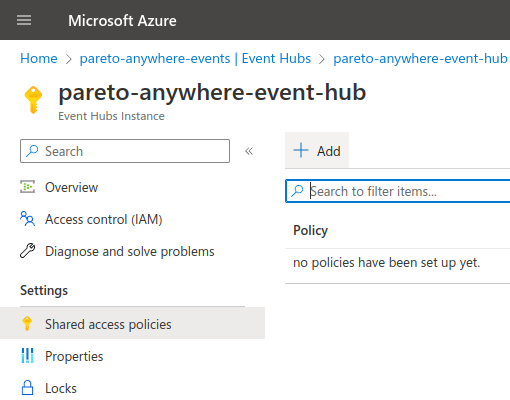
From the Event Hub overview, select Shared access policies in the Settings section of the menu at left.
Then click + Add to create a shared access policy.
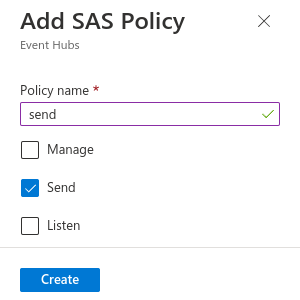
In the offcanvas menu at right, name the policy send and check the Send box.
Click Create at the bottom of the offcanvas menu to add the SAS policy.
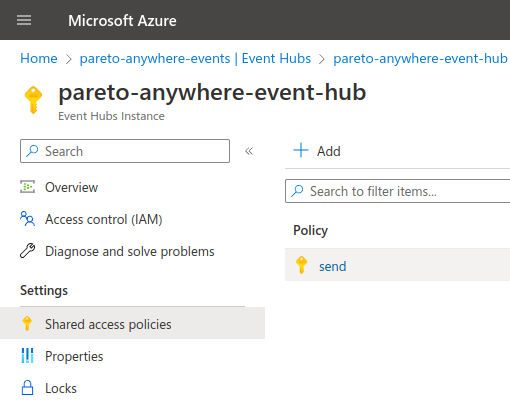
The send policy is created.
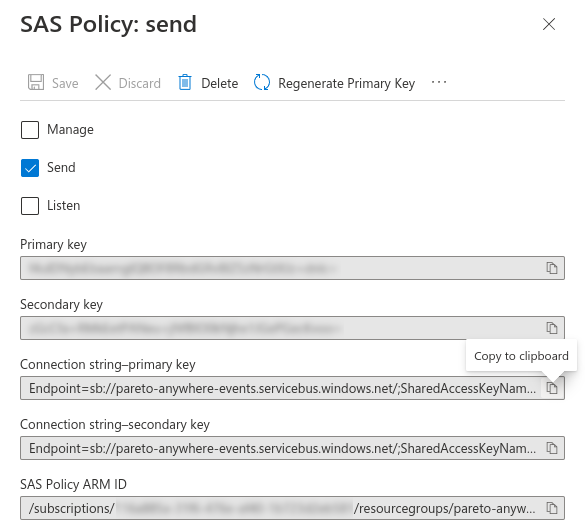
Select send from the list of shared access policies.
Copy and paste the contents of the Connection string-primary key field into the local.settings.json file as the "EventHubSendAppSetting" value, as indicated below, and then save the file.
{
  "Values": {
    ⋮
    "EventHubSendAppSetting": "Endpoint=…",
    ⋮
  }
}
Create a Web PubSub Part 4
From the Resource group page in the Azure Portal, create a new Web PubSub by following the 5 tabbed steps below:
Select + Create from the menu bar on the Resource Group page.
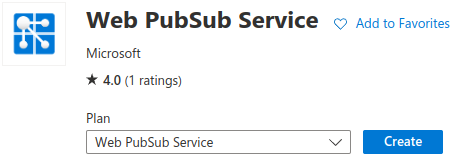
From the Marketplace, search for and select Web PubSub.
Click Create to create an instance of this resource.
Enter a meaningful name for your Web PubSub Service and select the geographical region best suited for your deployment. Choose the Free tier* if the web app is likely to receive moderate use. Then click Review + create at the bottom of the page.

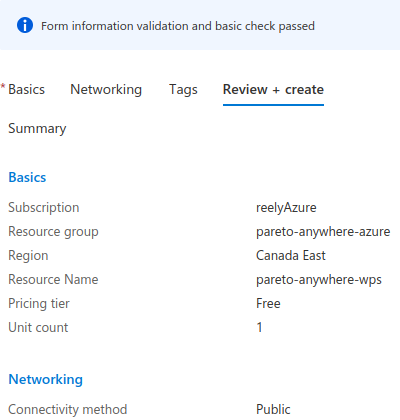
Click Create at the bottom of the page after validating the resource details.
The Web PubSub Service has been created.
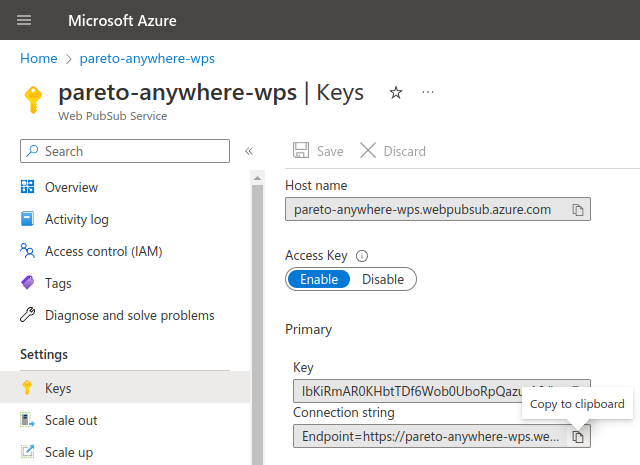
From the Web PubSub instance page, select Keys in the Settings section of the menu on the left, and copy and paste the contents of the Primary Connection string field into the local.settings.json file as the "WebPubSubConnectionString" value, as indicated below. Also enter the Web PubSub name* as the "web_pub_sub_hub_name" value, and then save the file.
{
  "Values": {
    ⋮
    "web_pub_sub_hub_name": "paretoanywherewps",
    "WebPubSubConnectionString": "Endpoint=…",
    ⋮
  }
}
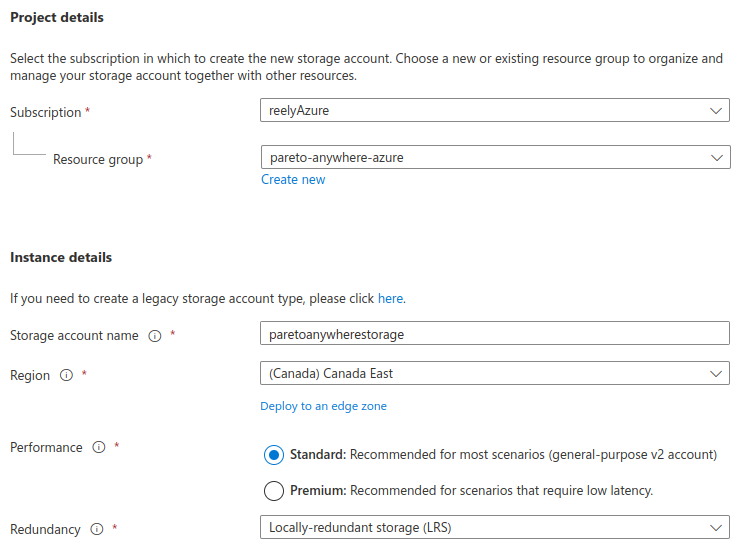
Create a Storage Account Part 5
From the Resource group page in the Azure Portal, create a new Storage Account by following the 6 tabbed steps below:
Select + Create from the menu bar on the Resource Group page.

From the Marketplace, search for and select Storage Account.
Click Create to create an instance of this resource.
Enter a meaningful name for your Storage Account and select the geographical region best suited for your deployment. Choose performance and redundancy settings adapted to the needs of your deployment. Then click Review + create at the bottom of the page.
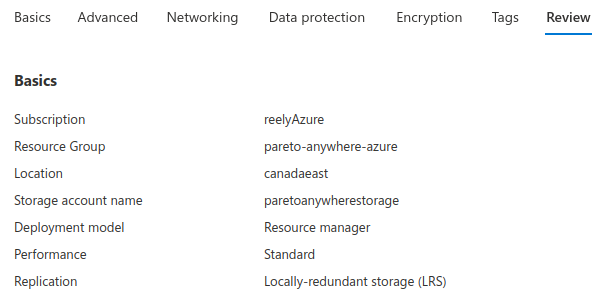
Click Create at the bottom of the page after validating the resource details.
The Storage Account has been created.

From the Storage Account instance page, select Access keys in the Security + networking section of the menu on the left, and copy and paste the contents of the key1 Connection string field into the local.settings.json file as the "AzureWebJobsStorage" value, as indicated below, and then save the file.
{
  "Values": {
    ⋮
    "AzureWebJobsStorage": "DefaultEndpointsProtocol=…"
  }
}
Validate the local settings file Part 6
The local.settings.json file should now be complete and resemble the following, with resource names and keys matching your configuration:
{
  "IsEncrypted": false,
  "Values": {
    "FUNCTIONS_WORKER_RUNTIME": "node",
    "iot_hub_name": "pareto-anywhere-iot-hub",
    "EventHubConnectionString": "Endpoint=sb://iothub-ns-pareto-any-24301626-e4d77e48f3.servicebus.windows.net/;SharedAccessKeyName=iothubowner;SharedAccessKey=X;EntityPath=pareto-anywhere-iot-hub",
    "event_hub_name": "pareto-anywhere-event-hub",
    "EventHubSendAppSetting": "Endpoint=sb://pareto-anywhere-event-hub.servicebus.windows.net/;SharedAccessKeyName=send;SharedAccessKey=X;EntityPath=pareto-anywhere-events",
    "web_pub_sub_hub_name": "paretoanywherewps",
    "WebPubSubConnectionString": "Endpoint=https://pareto-anywhere-wps.webpubsub.azure.com;AccessKey=X;Version=1.0;",
    "AzureWebJobsStorage": "DefaultEndpointsProtocol=https;AccountName=paretoanywherestorage;AccountKey=X;EndpointSuffix=core.windows.net"
  }
}
Run in the environment Step 4 of 6
Validate the configuration by running Pareto Anywhere for Azure either in Codespaces or on your computer.
- What will happen?
- The Azure Functions Core Tools will run the program within the environment, connecting with the resources created on Azure in the previous steps.
- Will data be processed?
- Yes, if there are messages at the IoT Hub, they will be processed—within the environment—by Pareto Anywhere for Azure.

Run the stateless function Part 1
From the terminal browse to the pareto-anywhere-azure folder, then run with the command func start.
If the Azure resources and the local.settings.json file are correctly configured, the console output should appear as follows:
Azure Functions Core Tools
Core Tools Version:       4.x.xxxx Commit hash: N/A  (64-bit)
Function Runtime Version: 4.x.x.xxxxx


Functions:

	negotiateConnection:  http://localhost:7071/app/wsconnection

	serveWebApp: [GET] http://localhost:7071/app/{folder?}/{filename?}


	processIoTHubMessages: eventHubTrigger

For detailed output, run func with --verbose flag.
[2023-01-23T12:34:56.789Z] Worker process started and initialized.
If messages are received/queued at the IoT Hub, the console output will include notifications of Pareto Anywhere for Azure executing locally as follows:
[2023-01-23T12:34:56.789Z] Executing 'Functions.processIoTHubMessages'
Browse to the web app Part 2
Complete the steps below for either a Codespaces or a Local environment.
Codespaces
From the Codespaces IDE complete the following steps:
- Select the PORTS tab
- In the function-app-preview (7071) row, select the icon to Copy Local Address (Ctrl+C)
Paste this address in a new browser tab, append app/ to the URL, then follow the link to observe the web application served from Codespaces.
ex: https://some-random-name-7071.app.github.dev/app/
Local
Point a web browser to http://localhost:7071/app/ to observe the web application running locally.
Customise the web app (OPTIONAL) Part 3
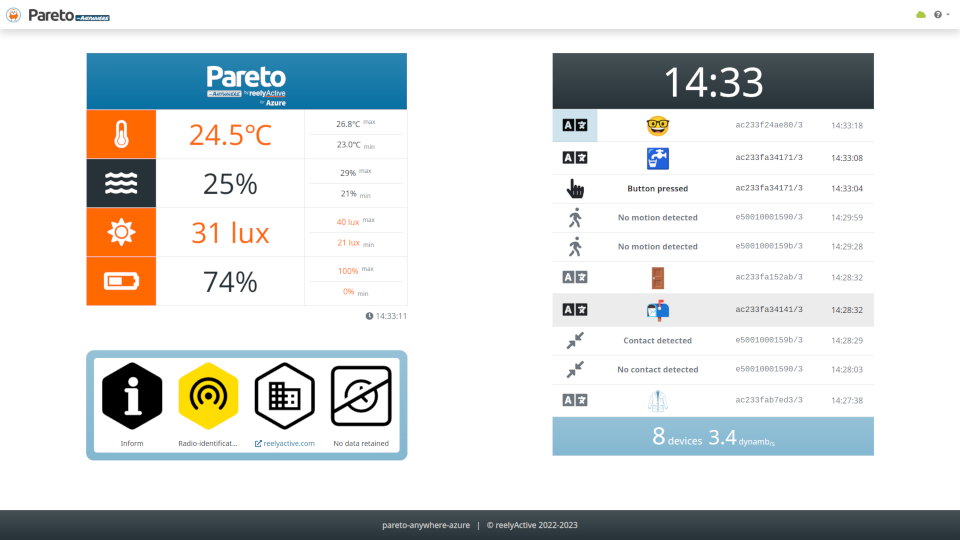
For convenience, the web app and all its dependencies are served by the Azure Function itself from the /serveWebApp folder (and its /images /js /style subfolders). Simply edit the index.html file and the dependencies as required, and the changes will appear as soon as the function restarts.
The web app observes the reelyActive Web Style Guide with the additional dependencies of beaver.js and cuttlefish.js to collect and render the real-time dynamic ambient data, respectively.
The web app includes Digital Trust for Places & Routines (DTPR) iconography to inform about the purpose, technology, accountability and data retention of the digital systems present in the physical space. The icons, descriptions and links can easily be updated (in the index.html file) to reflect the reality of the deployment.
Run on Azure Step 5 of 6
Complete the deployment by running Pareto Anywhere for Azure—on Azure.
- What will happen?
- The Azure Functions Core Tools will publish the code and configuration to Azure, so that runs as a stateless Azure Function.
- What's an Azure Function?
- Azure Functions are event-driven serverless code functions that run in a Function App.
Create an Azure Function Part 1
From the Resource group page in the Azure Portal, create a new Function App by following the 7 tabbed steps below:
Select + Create from the menu bar on the Resource Group page.

From the Marketplace, search for and select Function App.
Click Create to create an instance of this resource.
Enter a meaningful name for your Function and complete the settings as follows:
- Publish as Code
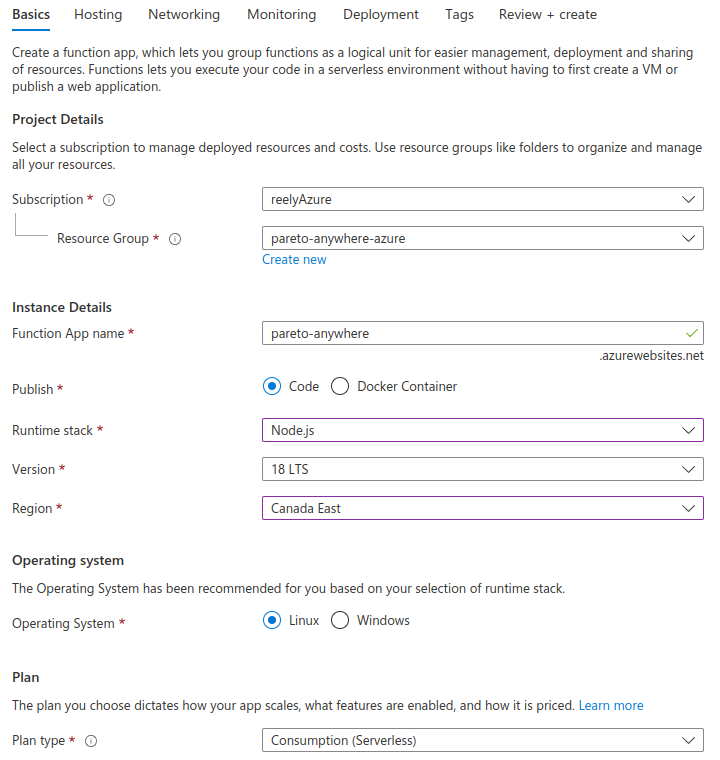
Click Next: Hosting > at the bottom of the page to continue the configuration.
Select the Storage Account created in Step 3 Part 5.
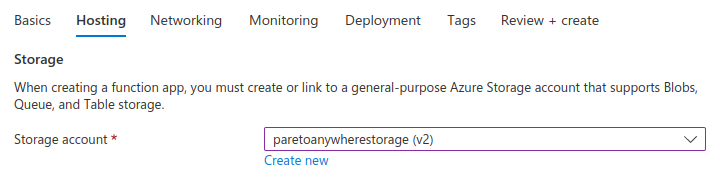
Click Next: Networking > at the bottom of the page to continue the configuration.
Enable or disable public Internet access of the function (specifically the web app and Web PubSub).

Click Review + create at the bottom of the page to validate the configuration.

Click Create at the bottom of the page after validating the resource details.
The Function has been created.
Proceed to Part 2 to deploy the code to Azure.
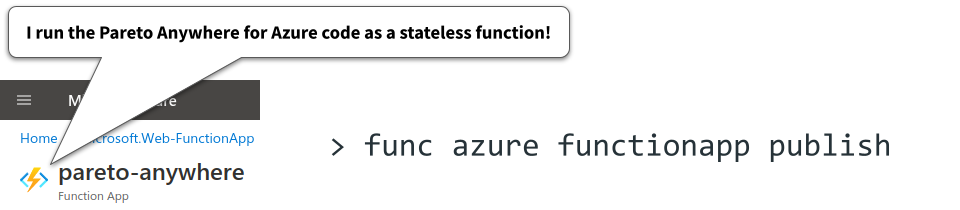
Run as an Azure Function Part 2
From the terminal log in to Azure with the command az login.
Browse to the pareto-anywhere-azure folder, then publish to Azure with the following command:
func azure functionapp publish app-name --publish-local-settings -i
substituting app-name for the Function name you selected in Part 1 above (ex: pareto-anywhere).
If the Azure resources and the local.settings.json file are correctly configured, the package will be uploaded and the console output should complete as follows:
Functions in pareto-anywhere:
    negotiateConnection - [httpTrigger]
        Invoke url: https://pareto-anywhere.azurewebsites.net/app/wsconnection

    processIoTHubMessages - [eventHubTrigger]

    serveWebApp - [httpTrigger]
        Invoke url: https://pareto-anywhere.azurewebsites.net/app/{folder?}/{filename?}
Browse to the web app on Azure Part 3
Point a web browser to https://app-name.azurewebsites.net/app/, again substituting app-name for the Function name you selected in Part 1 above, to observe the web application running on Azure.
Optimise the web app (OPTIONAL) Part 4
In the case where the web app is used in production, and/or the URL is shared publicly, it is strongly advised to optimise how the content is served. For example, at a minimum, all dependencies of the index.html file may be served by a CDN or an Azure service like Static Web Apps, for efficiency and security.
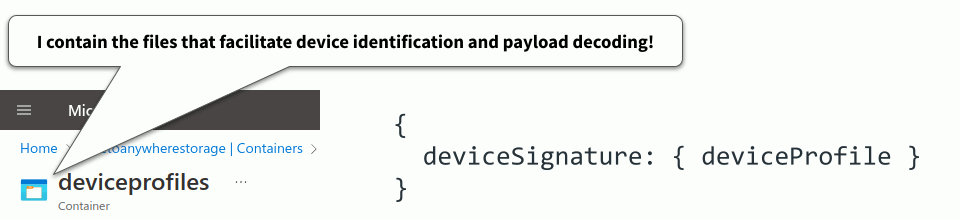
Create device profiles Step 6 of 6
Optionally create device profile files to facilitate device identification and payload decoding.
- Is this necessary?
- In the case of EnOcean Alliance devices, yes, as device identifier and EEP pairs are required to decode the payloads.
- How does it work?
- The function app can access the file(s) from memory at run time.
Create a storage container Part 1
Within the Storage Account resource created in Step 3, from the Azure Portal, create a new Storage Container by following the 3 tabbed steps below:
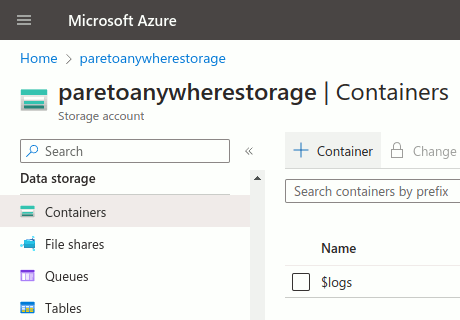
From the Storage Account instance page, select Containers in the Data storage section of the menu on the left.
Select + Container to create a new storage container.
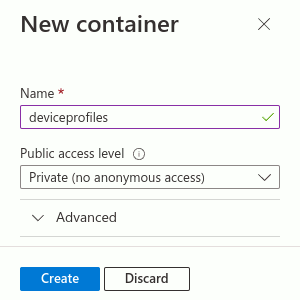
Enter the name deviceprofiles and click Create to create the storage container.
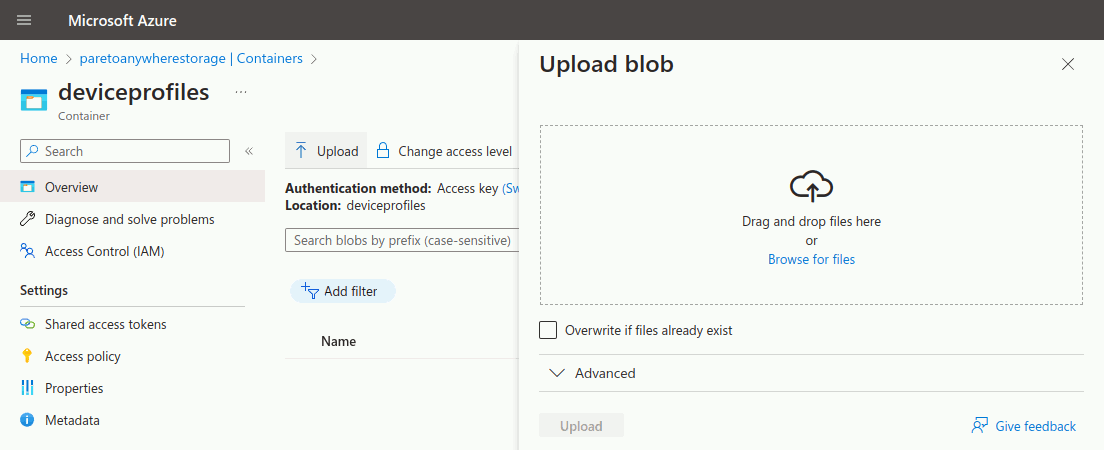
To upload files (blobs) to the deviceprofiles Container, as required below, simply click Upload from the Container overview page and follow the indications in the overlay at right.
In the Advanced settings, consider reducing the Block size to the minimum of 64 KiB for efficiency, as the files are unlikely to exceed that size.
Create and upload blobs (OPTIONAL) Part 2
Create and upload any of the blobs below, as required for the specific deployment.
For sub-GHz EnOcean Alliance devices, create an enocean.json file consisting of pairs of device identifiers and EnOcean Equipment Profile (EEP) types, based on the following example of 3 common devices.
{
    "041400ab/7": { "eepType": "D2-14-41" },
    "051700cd/7": { "eepType": "A5-04-03" },
    "059100ef/7": { "eepType": "D5-00-01" }
}
This file is not required for Bluetooth Low Energy (2.4GHz) EnOcean devices.
Each 32-bit EnOcean Unique Radio Identifier (EURID) is entered as 8 lowercase hexadecimal characters (0-9, a-f), with the suffix /7 to specify the identifier type (see Cheatsheet).
Each EEP type is entered as three dash-separated uppercase hexadecimal character pairs (see advlib-esp and its submodules for all implemented EEP types).
Upload the file to the deviceprofiles Container as specified in Part 1 above.


Tutorial prepared with ♥ by jeffyactive.
You can reelyActive's open source efforts directly by contributing code & docs, collectively by sharing across your network, and commercially through our packages.Where to next?
Continue exploring our open architecture and all its applications.
-

-
Directory of Devices
Browse all device configuration tutorials and development guides.
-

-
reelyActive Developers
Browse all developer documentation and tutorials.
-

-
reelyActive
Let's put things in context, one space at a time.