Build web apps with beaver.js
Tap into a real-time 'stream' of contextual data

Want to build custom web applications on top of the real-time contextual data 'stream' from your Pareto account and/or our open source software? You're in the right place. Here we'll show you how to build a simple webpage where beaver.js taps into the socket.io feed of real-time events so that you can use the data in your web application as you 'chews'. Okay, enough with the beaver puns!
Ready to 'sink your teeth' into the tutorial? Dam it — enough already!
The data source
A beaver can't fill a pond without a source of water and beaver.js can't collect contextual events without a real-time data feed! You'll need one of the following:
- a live Pareto account
- a live hlc-server instance
- our live example data stream
If you'll be tapping into the data stream from your live Pareto account, first follow our Connect a websocket client to Pareto tutorial. In the other two cases, you already have an accessible socket.io feed to which we can point beaver.js.
Wait, what's Pareto?

Pareto is our enterprise cloud platform which provides the convenience and scalability of SaaS.
Visit getpareto.com Log in to your account
Clone the beaver.js example repository
Our beaver.js example code already tabs into our live example data stream: check it out. We can simply clone the GitHub repository and use the code as a starting point. Create a beaver folder on your computer and from that folder, on the command line, run
git clone https://github.com/reelyactive/beaver.git
If you're not familiar with git, browse to the repository and instead download it as a ZIP.
Run the beaver.js example code
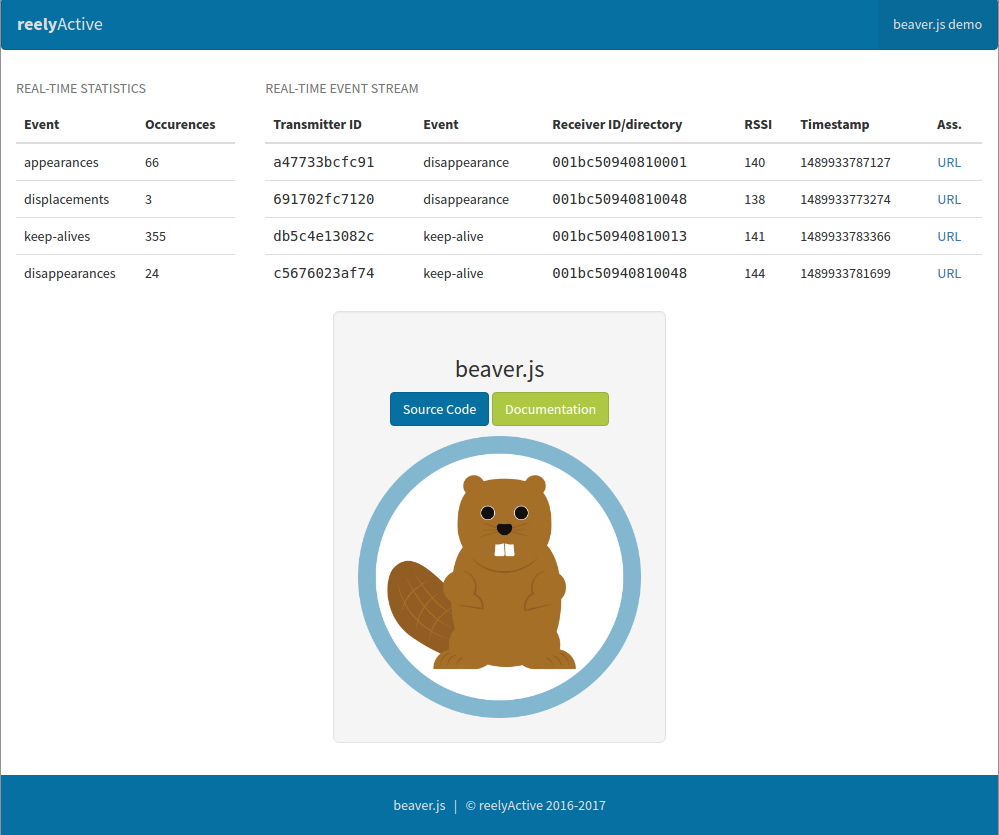
To run the code, simply open the index.html file in your favourite web browser and you should see a screen like this:
Tap into your own data stream
In the example code, beaver.js is sourcing data from https://www.hyperlocalcontext.com/ using socket.io. If you browse to that URL, you won't see anything — it expects a websocket connection! Next we'll point beaver.js to your own data stream.
Open the file js/dashboard.js and you should see DEFAULT_SOCKET_URL at the top. This is where we tell beaver.js where to connect and listen. Change it as follows:
DEFAULT_SOCKET_URL = 'http://localhost:3001';
Now, if you're running an hlc-server instance on the same machine, either as specified in the Connect a websocket client to Pareto tutorial, the Make a Raspberry Pi Hub tutorial, or the Hello Hyperlocal Context example, you should be providing a live data feed on localhost:3001.
Again, open (or refresh) the index.html file in your favourite web browser and you should see live data — this time your own!
How does the example work?
Before adapting the example, let's take a look at what each file does.
| File | Purpose |
|---|---|
| index.html | The main file in the web application, it specifies to the browser all the supporting files to load and the viewable content. You'll surely want to edit what's between the body tags. |
| style/reelyactive.css | The Cascading Style Sheet which defines the reelyActive look-and-feel. Don't like #0770a2 blue? Change it in this file. |
| js/dashboard.js | The main JavaScript code of the web application, it instructs beaver.js where to connect and listen, and does useful things with the real-time events that beaver.js emits. You'll surely want to edit (at least) the handleEvent(event) function. |
| js/beaver.js | The JavaScript code that connects and listens to the data feed, processes it, and emits events for your own JavaScript code to handle. There is no need to edit this code. |
| js/socket.min.js | The JavaScript code by btford that implements socket.io for Angular.js. There is no need to edit this code. |
Like all of our client-side code, the beaver.js example follows our Angular.js Style Guide which we invite you to use for inspiration.
reelyActive's Angular.js Style Guide
Build your own web application
The beaver.js example should serve as a solid starting point for building your own web application. If you're simply experimenting and looking for ideas of what to build, here are a few:
- create a simple asset management dashboard which shows what's present (and where)
- create a checkpoint application which displays passage counts and times
- trigger image, audio or video content on screen when a new device is detected or gets close to a sensor
- create generative, multimedia web art from the steady stream of events
What's next?
Read the beaver story, or return to the diyActive home page.