Set up a hosted Elasticsearch Service
Our step-by-step guide to setup Elastic's hosted cloud service for use with our open source software.
The TL;DR (Too Long; Didn't Read)
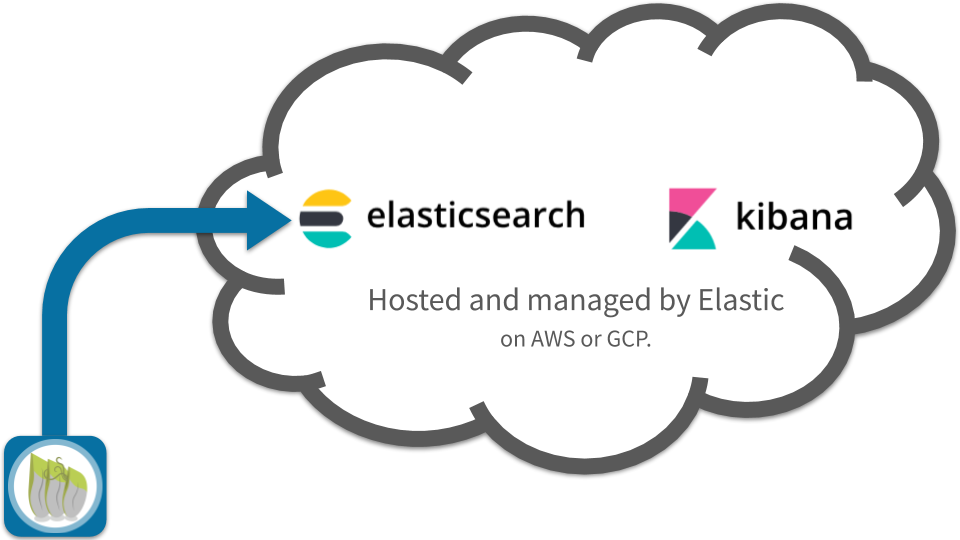
Learn how to deploy a hosted Elasticsearch Service to store and visualise data from the reelyActive platform.
- What will this accomplish?
- A free trial of the Elasticsearch Service, hosted in the cloud.
- Is there an easier way?
- No. The Elasticsearch Service is more convenient than hosting one's own instance on-prem or in the cloud.
- Can I do it the hard way?
- Yes. We also have a tutorial on how to install and run Elasticsearch on a laptop.
Starting a free trial Step 1 of 4
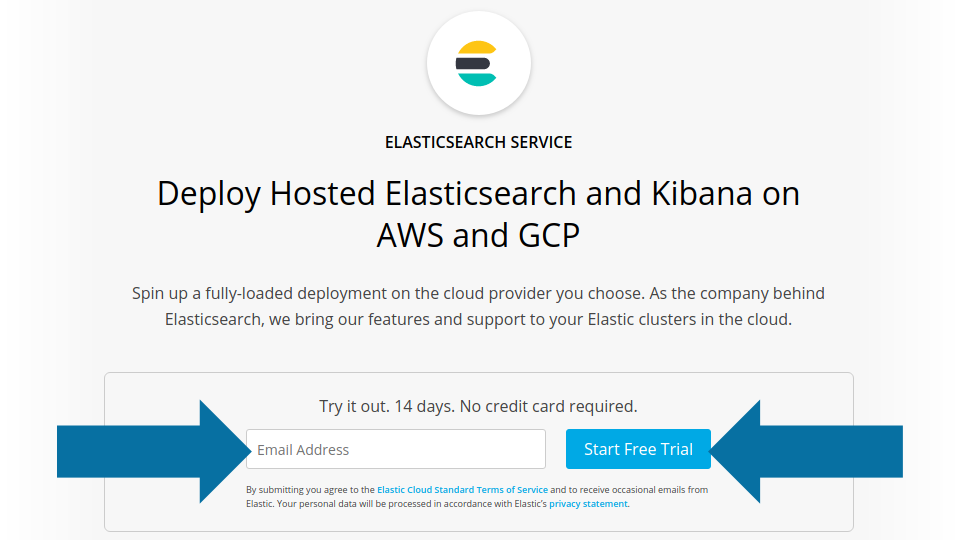
Simply provide an e-mail address to start a free trial of the hosted Elasticsearch Service.
- Why a trial?
- Because Elastic are kind enough to offer one for free! Easily transition to an invoiced service after the trial expires.
- Do I need a credit card?
- No. At the time of writing, no credit card is required for a 14-day trial.
Sign up for free Part 1
From any Internet-connected computer :
- Browse to www.elastic.co/cloud/elasticsearch-service/
- Enter the e-mail address to associate with the trial
- Click the Start Free Trial button
Elastic will now walk you through the next steps.
Follow the on-screen instructions Part 2
Check the e-mail account associated with the trial and follow the instructions until invited to Create Deployment, as this is covered in the next step below!
Creating a Deployment Step 2 of 4
Create a hosted deployment in five steps.
- What's a deployment?
- Each deployment is an instance of the Elastic stack on a cloud server, including Elasticsearch, Kibana and more.
- Can I simply select the defaults?
- Yes, for a trial, the default options are likely to work out just fine.

Name your deployment Part 1
Select a name for the deployment, for instance the name of the associated physical space or building .
Select a cloud platform Part 2
At the time of writing, the choices are AWS and GCP . This choice affects the potential geographic regions in which to host the data, and may also impact post-trial costs.
Select a region Part 3
Select a region based on geographic proximity or legal requirements .
Set up your deployment Part 4
Select the latest Version 7 release available and then:
- Leave unchecked the option to restore from a snapshot
- Leave unchecked the option for monitoring
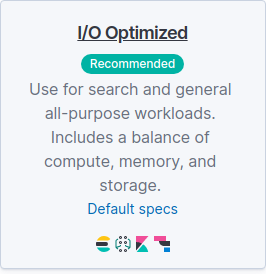
Optimize your deployment Part 5
Select the recommended I/O Optimized configuration.
Finally, click Create Deployment to create the deployment.
Retrieving the node and credentials Step 3 of 4
Retrieve the user credentials and the URL of the hosted Elasticsearch node.
- What's a node?
- A node is simply an instance of Elasticsearch.
- Why user credentials?
- A username and password ensure that only authorised users can read/write data to the Elasticsearch node.
This step assumes that the previous step, Creating a Deployment, is successfully completed.
Retrieve the password of the elastic user Part 1
After the Create Deployment button is clicked in the previous step, the web view should change to display the credentials of the Generated user, as in the image below.
- Note that the Username is elastic.
- Record the generated Password as it will only be displayed once.
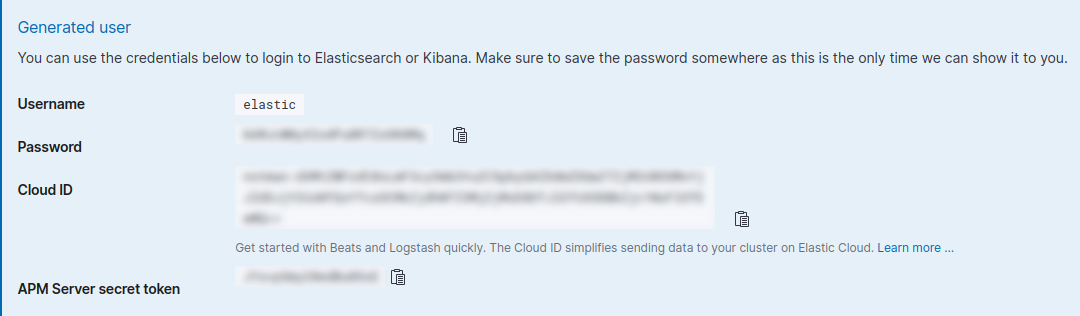
The Username and Password will be required for the reelyActive open source software to forward data to the Elasticsearch instance.
Retrieve the Elasticsearch URL Part 2
From the menu at left, select Elasticsearch under the given deployment, and then Copy Endpoint URL, as in the image below.
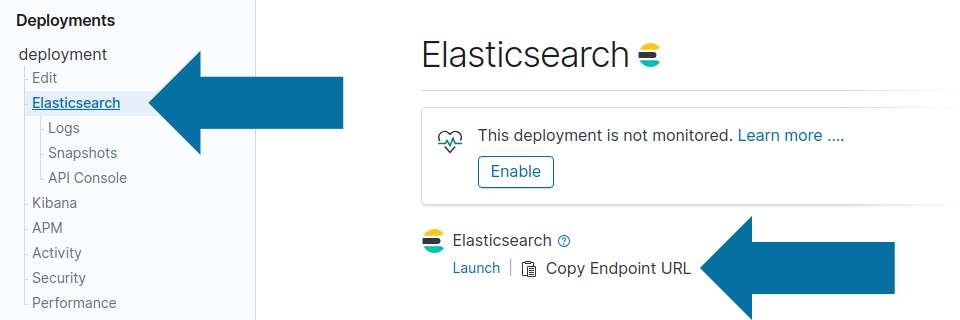
This URL will be required for the reelyActive open source software to forward data to the Elasticsearch instance, and will have a form similar to https://uuid.us-east-1.aws.found.io:9243 which combines a host and port as follows:
- Host:
uuid.us-east-1.aws.found.io- Port:
9243
Compile the Elasticsearch Node URL Part 3
Elasticsearch clients, such as the Node.js client used by the reelyActive open source software, take as input a node URL which, when remote, combines the username, password, host and port of the instance. The node URL has the following form:
https://username:password@host:port
If the password were simply password, then the compiled node URL would be similar to:
https://elastic:password@uuid.us-east-1.aws.found.io:9243
Record the compiled node URL. It will be required for use with the reelyActive open source software.
Launching Kibana Step 4 of 4
Kibana serves to create visualisations and dashboards described in other tutorials.
- Why Kibana?
- Kibana provides a powerful window into the data stored in Elasticsearch, including visualisations, dashboards and facilitating database queries and management.
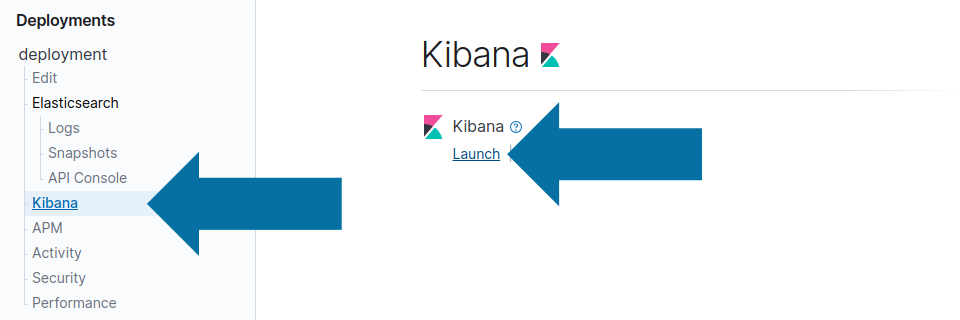
Launch Kibana Part 1
From the menu at left, select Kibana under the given deployment name, and then click Launch, as in the image below.
The configuration and use of Kibana is outside the scope of this tutorial. Complementary tutorials to come...

Winner of a 2020 Elastic Search Award!
For our innovation of making physical spaces searchable like the web.
Where to next?
Continue exploring our open architecture and all its applications.
-

diyActive Home
The home for reelyActive developers.